
Creating an Extreme Audio Install
Creating a statement audio upgrade is a passion for many installers. Their work often wows and delights. Sometimes the work behind the finish is overlooked. Here we have a little look behind the scenes.
However, it does draw interest from existing car audio converts as generally, such installs demonstrate the peak of what is possible.
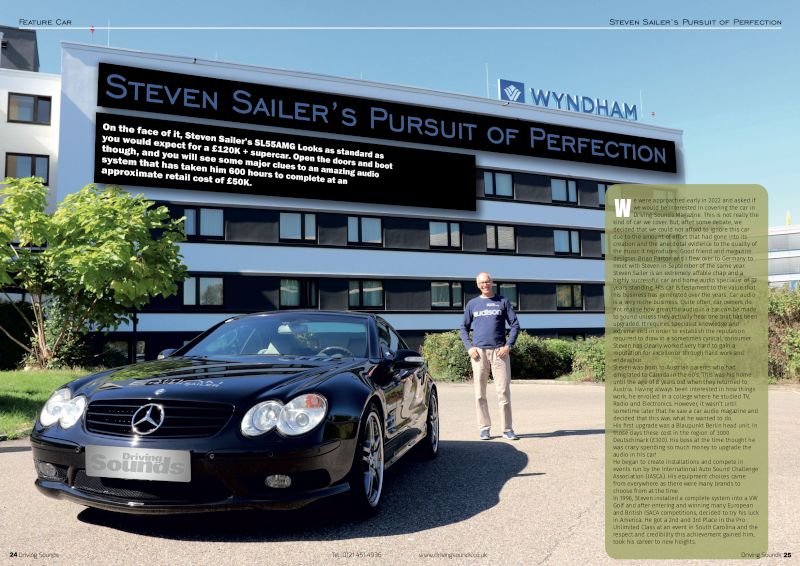
We recently went to look at one such installation in Germany belonging to audio professional Steven Sailer. The finish is absolutely impeccable but we wanted to take you into the workshop to look at the sheer enormity of the work that went into it.
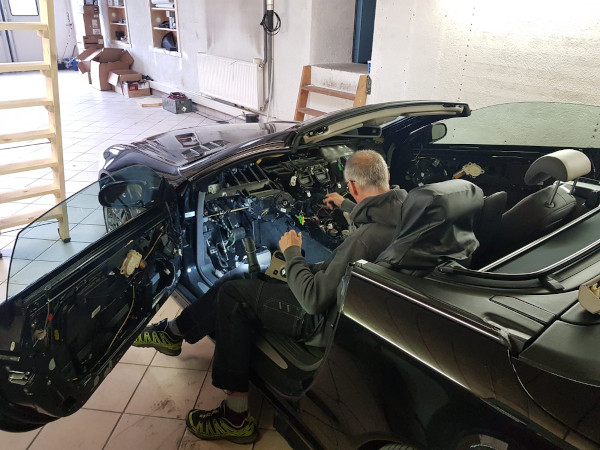
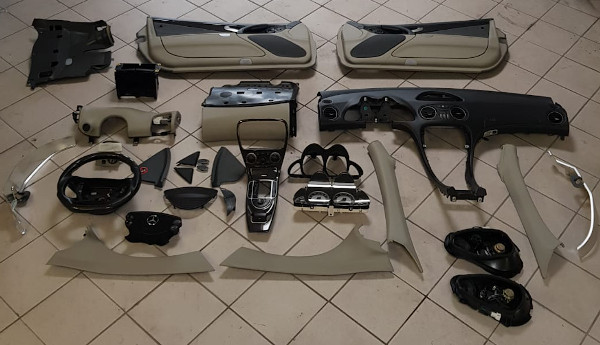
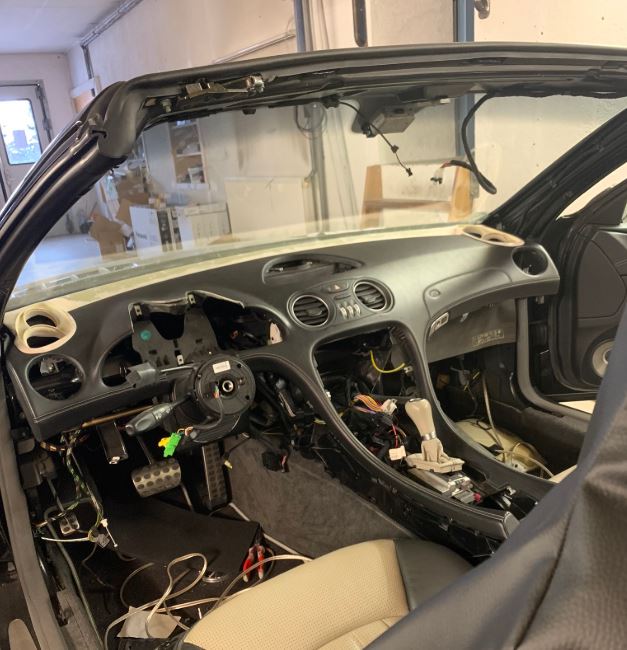
One of the scariest things to see, is a supercar being striped out. In this installation, Steven wanted to put the mid and high frequency speakers on axis up on the dashboard. The original factory positions were discounted as being unsuitable. Steven went to work to design and build a major dashboard modification.
Steven had already designed the front-end as he wanted it to be. These installs cannot be made up as you go along. Installers are innovating at this point and there is a good deal of pre design that has to go into this process. Sometimes of course, physical constraints can cause rethinks and redesigns but a solid vision of the end-game is a vital element.
Checking and double checking that the design will fit without adversely affecting the vehicle’s original equipment can save a lot of rework at a later stage. This is not a quick job and the skill and experience of the installer is of paramount importance. With this done, the messy work can begin!
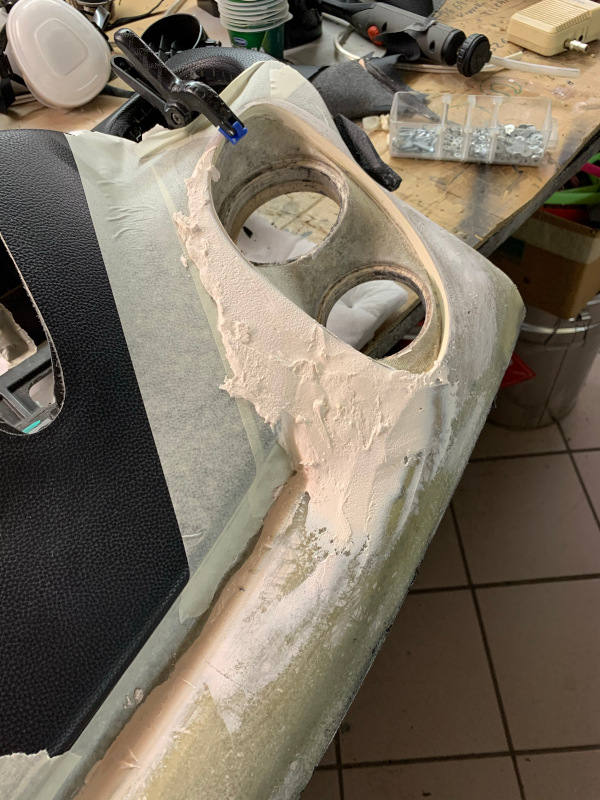
Resin, fibreglass, MDF are key ingredients when making serious modifications to a vehicle’s interior.
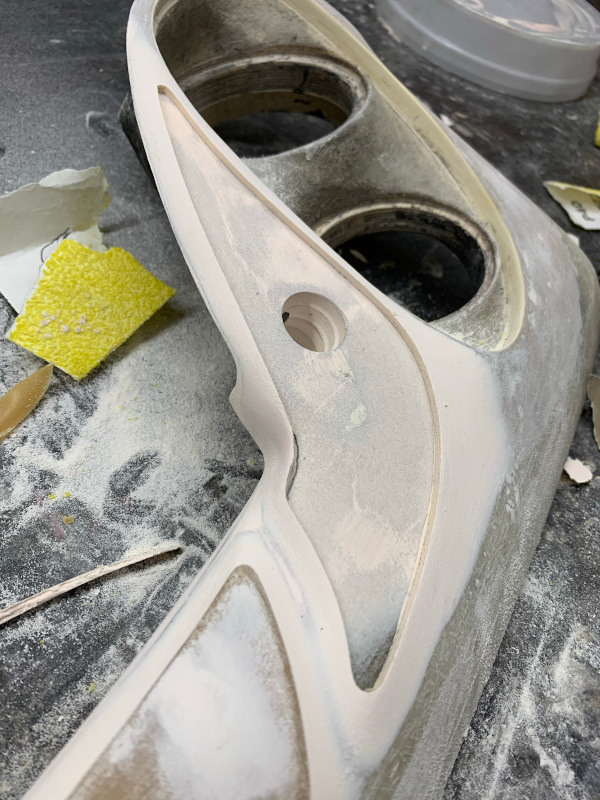
Literally hours of rubbing down are required in order to end up with a fine finish. Even the smallest lump or blemish will show through the trim material. This is painstaking, physical work requiring patience, accuracy and physical application.
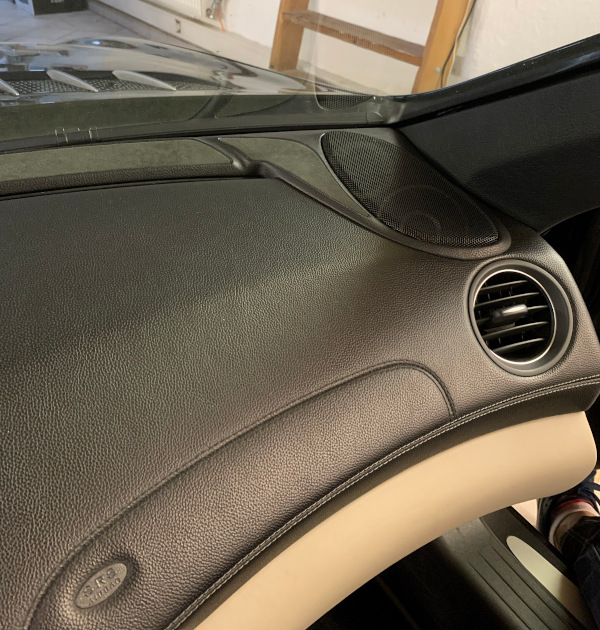
Completed, this element of the upgrade looks very natural in its final position. Time to move on to other elements. This was an extremely time consuming part of the project. Equal attention to detail went into the entire build.
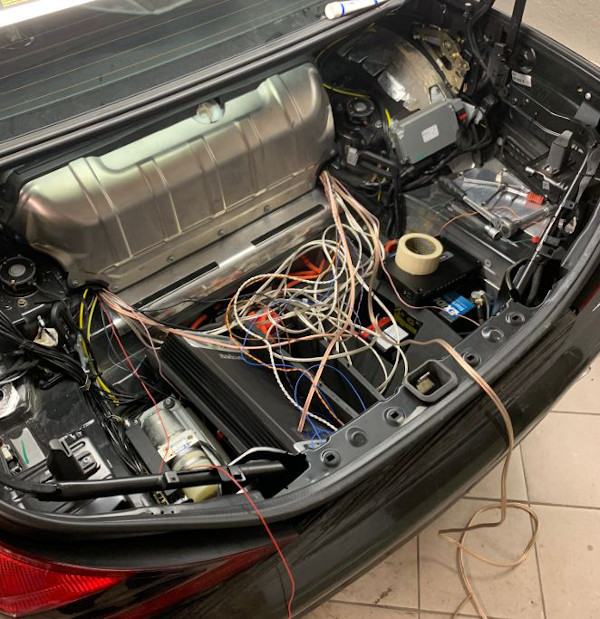
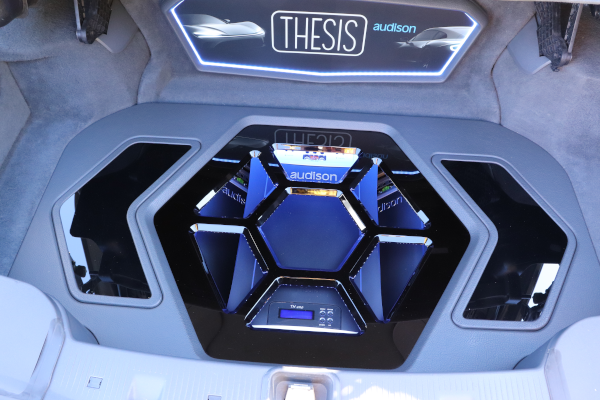
In this car, all the clever wiring happens in the rear luggage compartment. Here it is with the amp rack and electronics in place and all wires run ready for cutting to length and terminating. Looks like a scary mess doesn’t it?
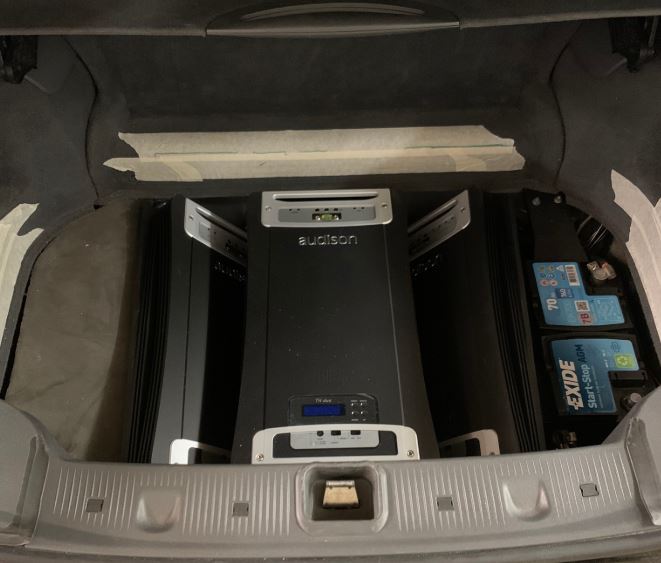
OK, You can look now! Wiring completed and neatly hidden away and the installers attention can go into producing an arty finish! – See headline image above.
We haven’t come close to showing you the whole build. We haven’t even touched on the two subwoofer builds, but hopefully, you get the idea of the huge amount of work that goes into a statement installation. We have featured Steven Sailer’s car here as he has a very comprehensive gallery of build-up shots on his website which can be viewed here: https://www.steven-sailer.com/car-entertainment/installationen/mercedes/sl55amg.html
Don’t forget to read the very fine Driving Sounds Magazine article on the finished vehicle including commentary from Steven Sailer himself on the Driving Sounds website where it can be downloaded free of charge. Go here: https://www.drivingsounds.co.uk/articles/steven-sailers-pursuit-of-perfection
Next time you are quoted for a tweeter pod build in your A-pillars, do consider the amount of work that goes into such custom modifications. The result of having mid-range and speakers and tweeters close together and on axis are staggering, but so may be the effort required to make it happen.

